Inhaltsverzeichnis

Webex Training - Help for Participants
Webex Training is a part of the Webex-Family, which is dedicated to virtual seminars/lectures and online trainings. The system supports both Video-, as well as pure audio conferences, as well as text chats, screen sharing and the sharing of schooling materials, live surveys and much more.
A comprehensive Step-by-Step Guide will appear by clicking the following headers.
How do I join a seminar?
<html> <style> .popupHintergrund { background-color: LightSteelBlue; border-radius: 5px; padding-left: 10px; padding-right: 10px; } </style> <body> <details> <summary><b>Joining a session via <u> Link </u></b></summary>
</html>
You will usually find a link in the accompanying Moodle course.
1) Click the link
The following window will open: 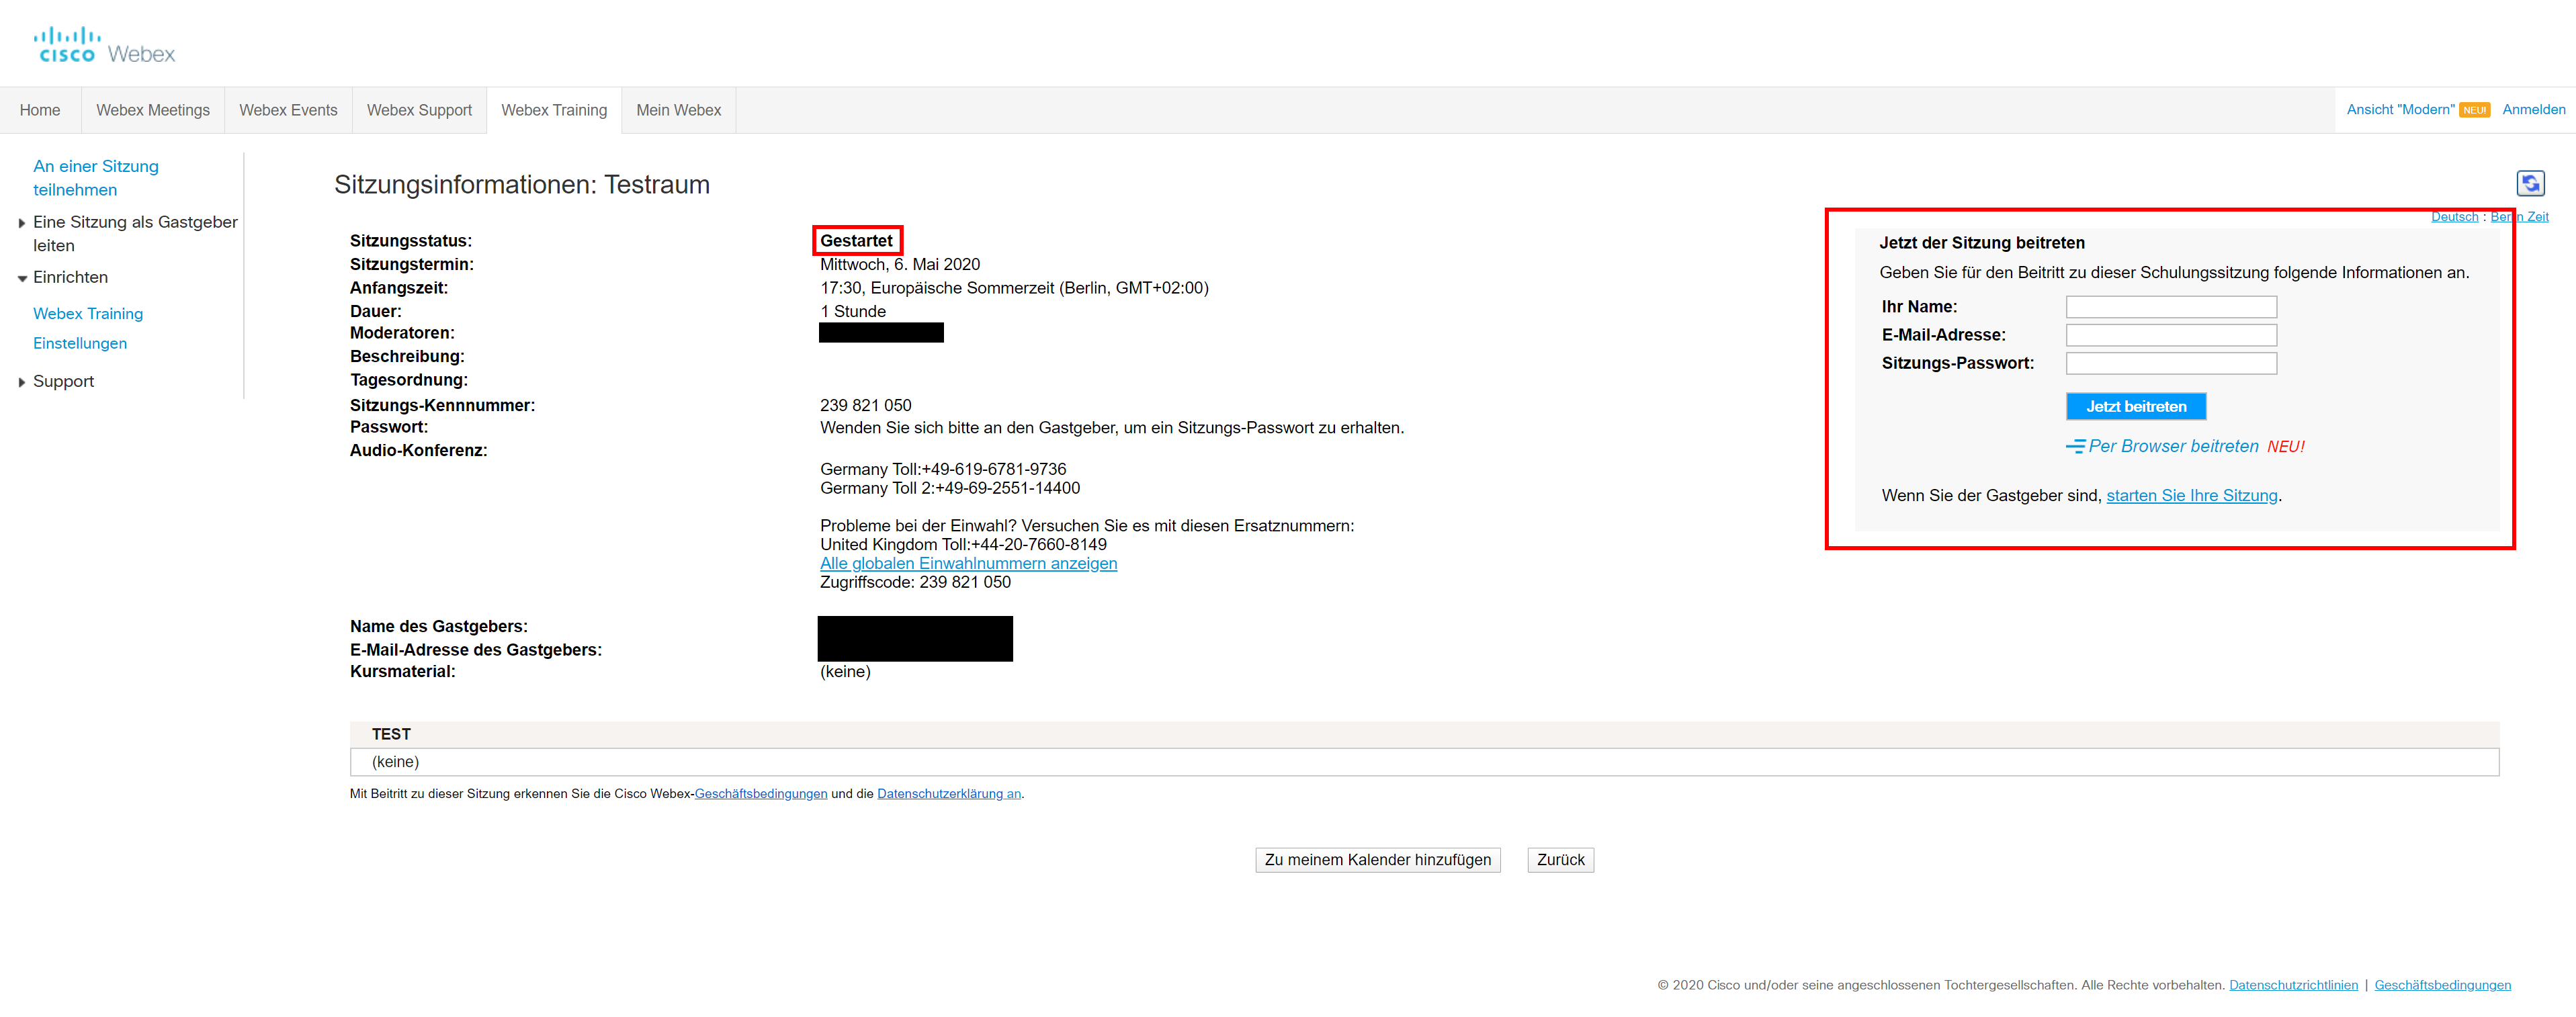 Now you can take part in the session by putting in your Name, E-Mail address and session password.
If the session has not been started yet the window will look as follows: (Session status will say „Not started“)
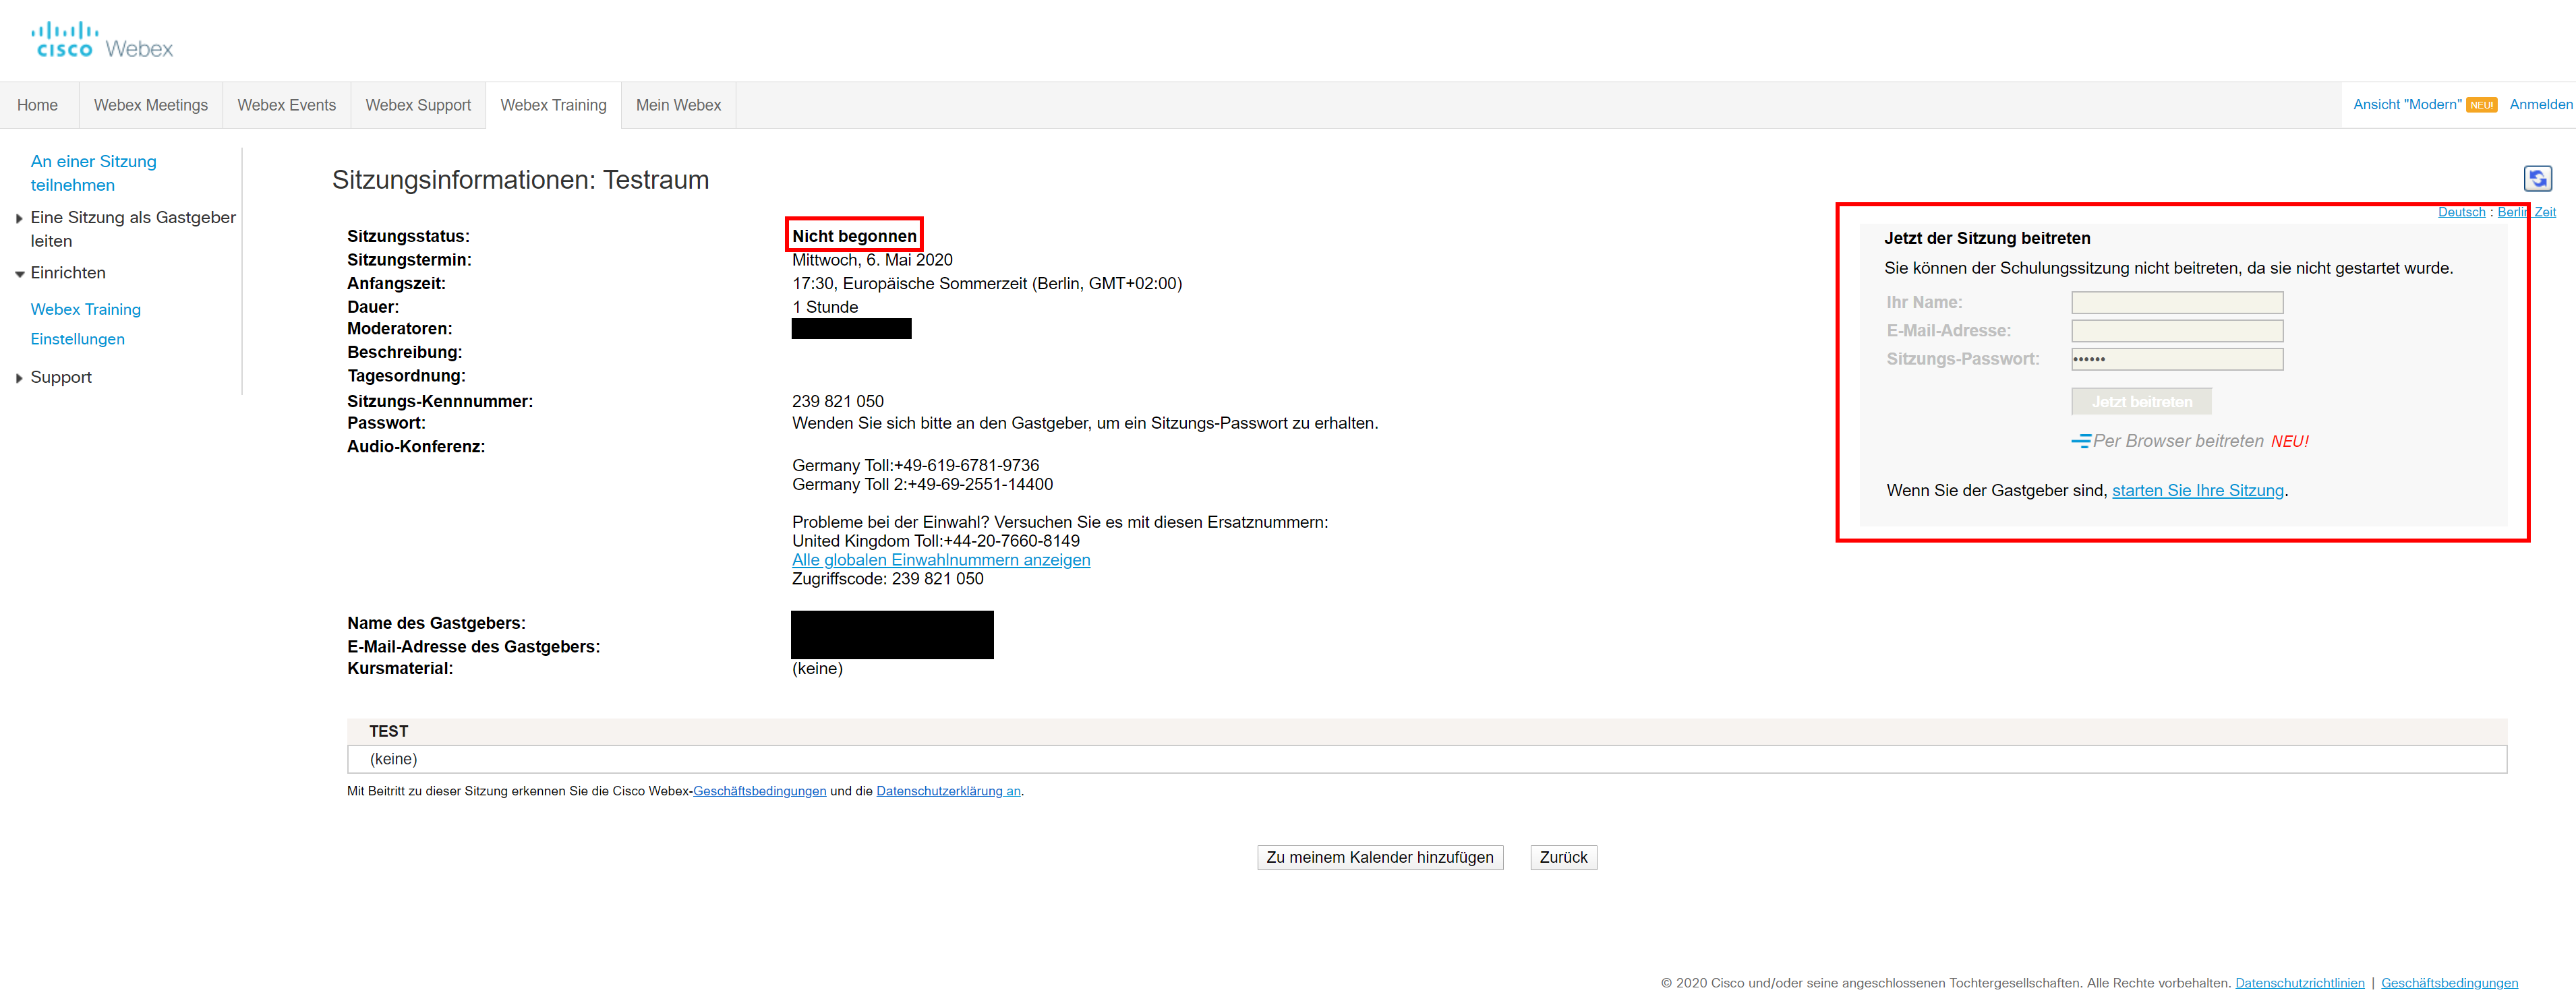 If that's the case you have to wait until the host starts the session. Refreshing the page will show you if the session has been started in the meantime.
Please click the button „Join now“ and not „Join per browser“! You will be asked to install the Webex App. The app is much more reliable and offers more features than joining per browser!
2) Joining the audio conference
To join the audio conference, you have to click „Call per computer“. It is recommended to check your microphone and speaker settings before joining.
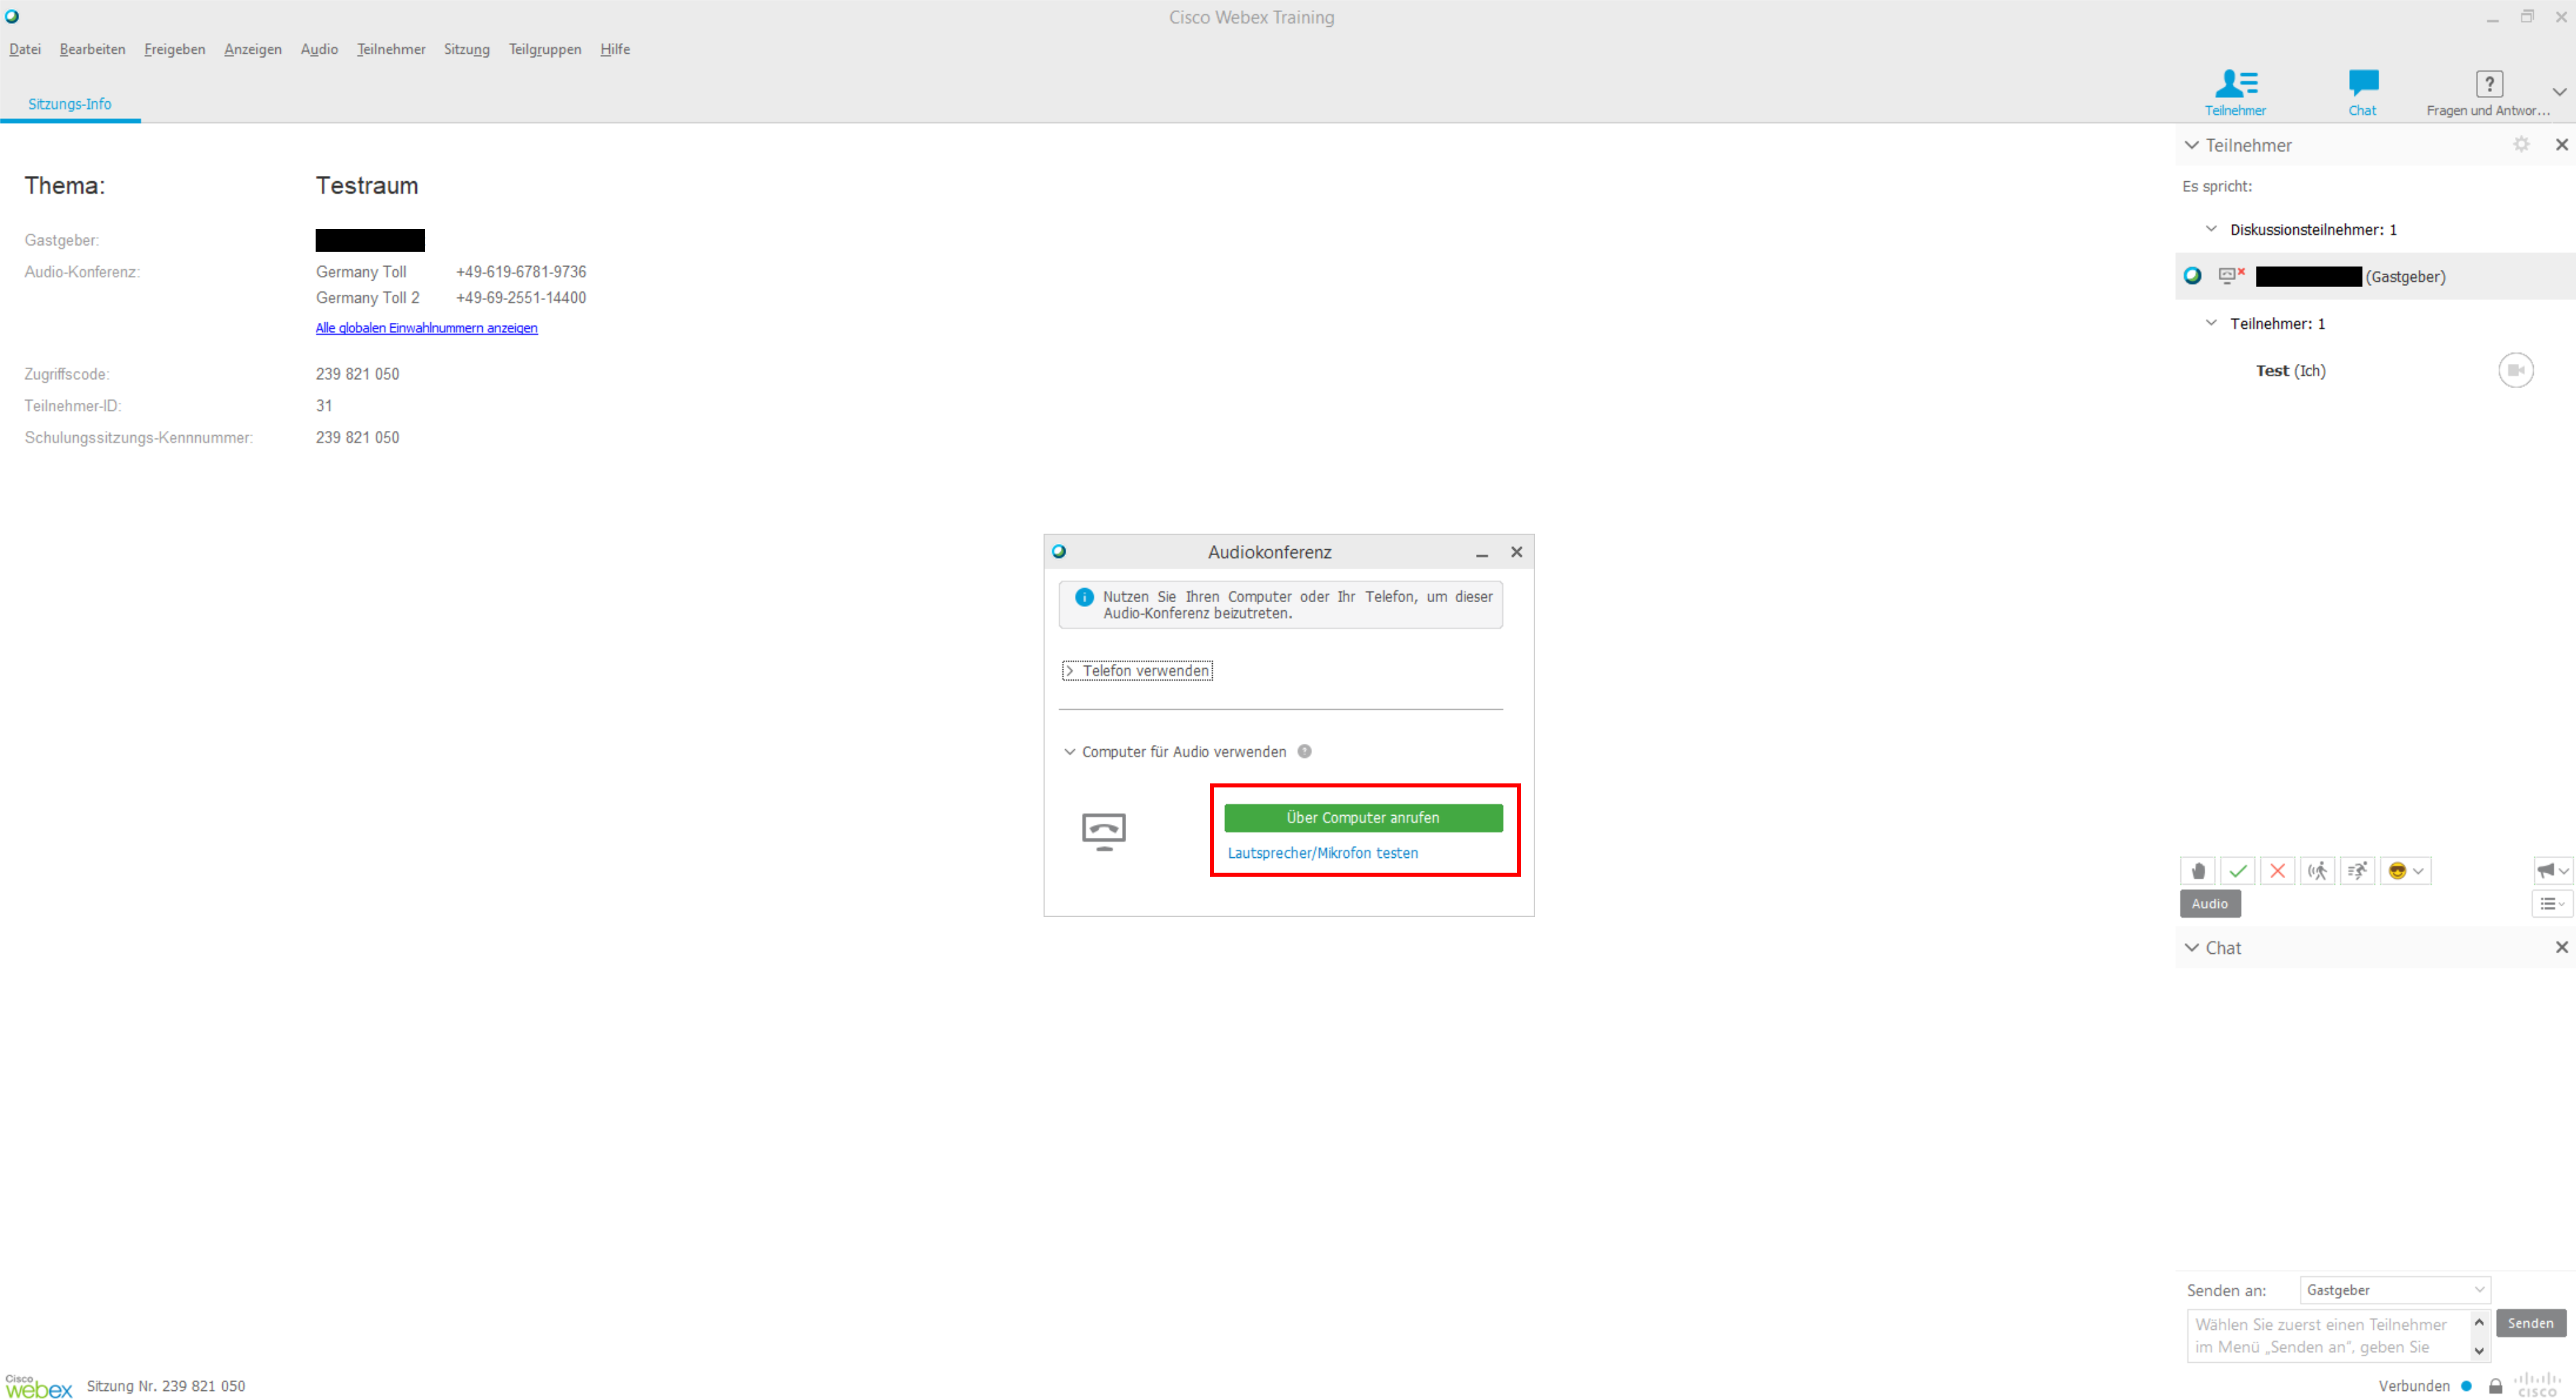
Now you successfully joined a Webex Training session.
Back to: How do I use Webex Training<html>
</details>
<br>
<details> <summary><b>Joining a session per <u>E-Mail-Invitation</u></b></summary>
</html>
It is possible, to receive an invitation per E-Mail. It looks as follows:
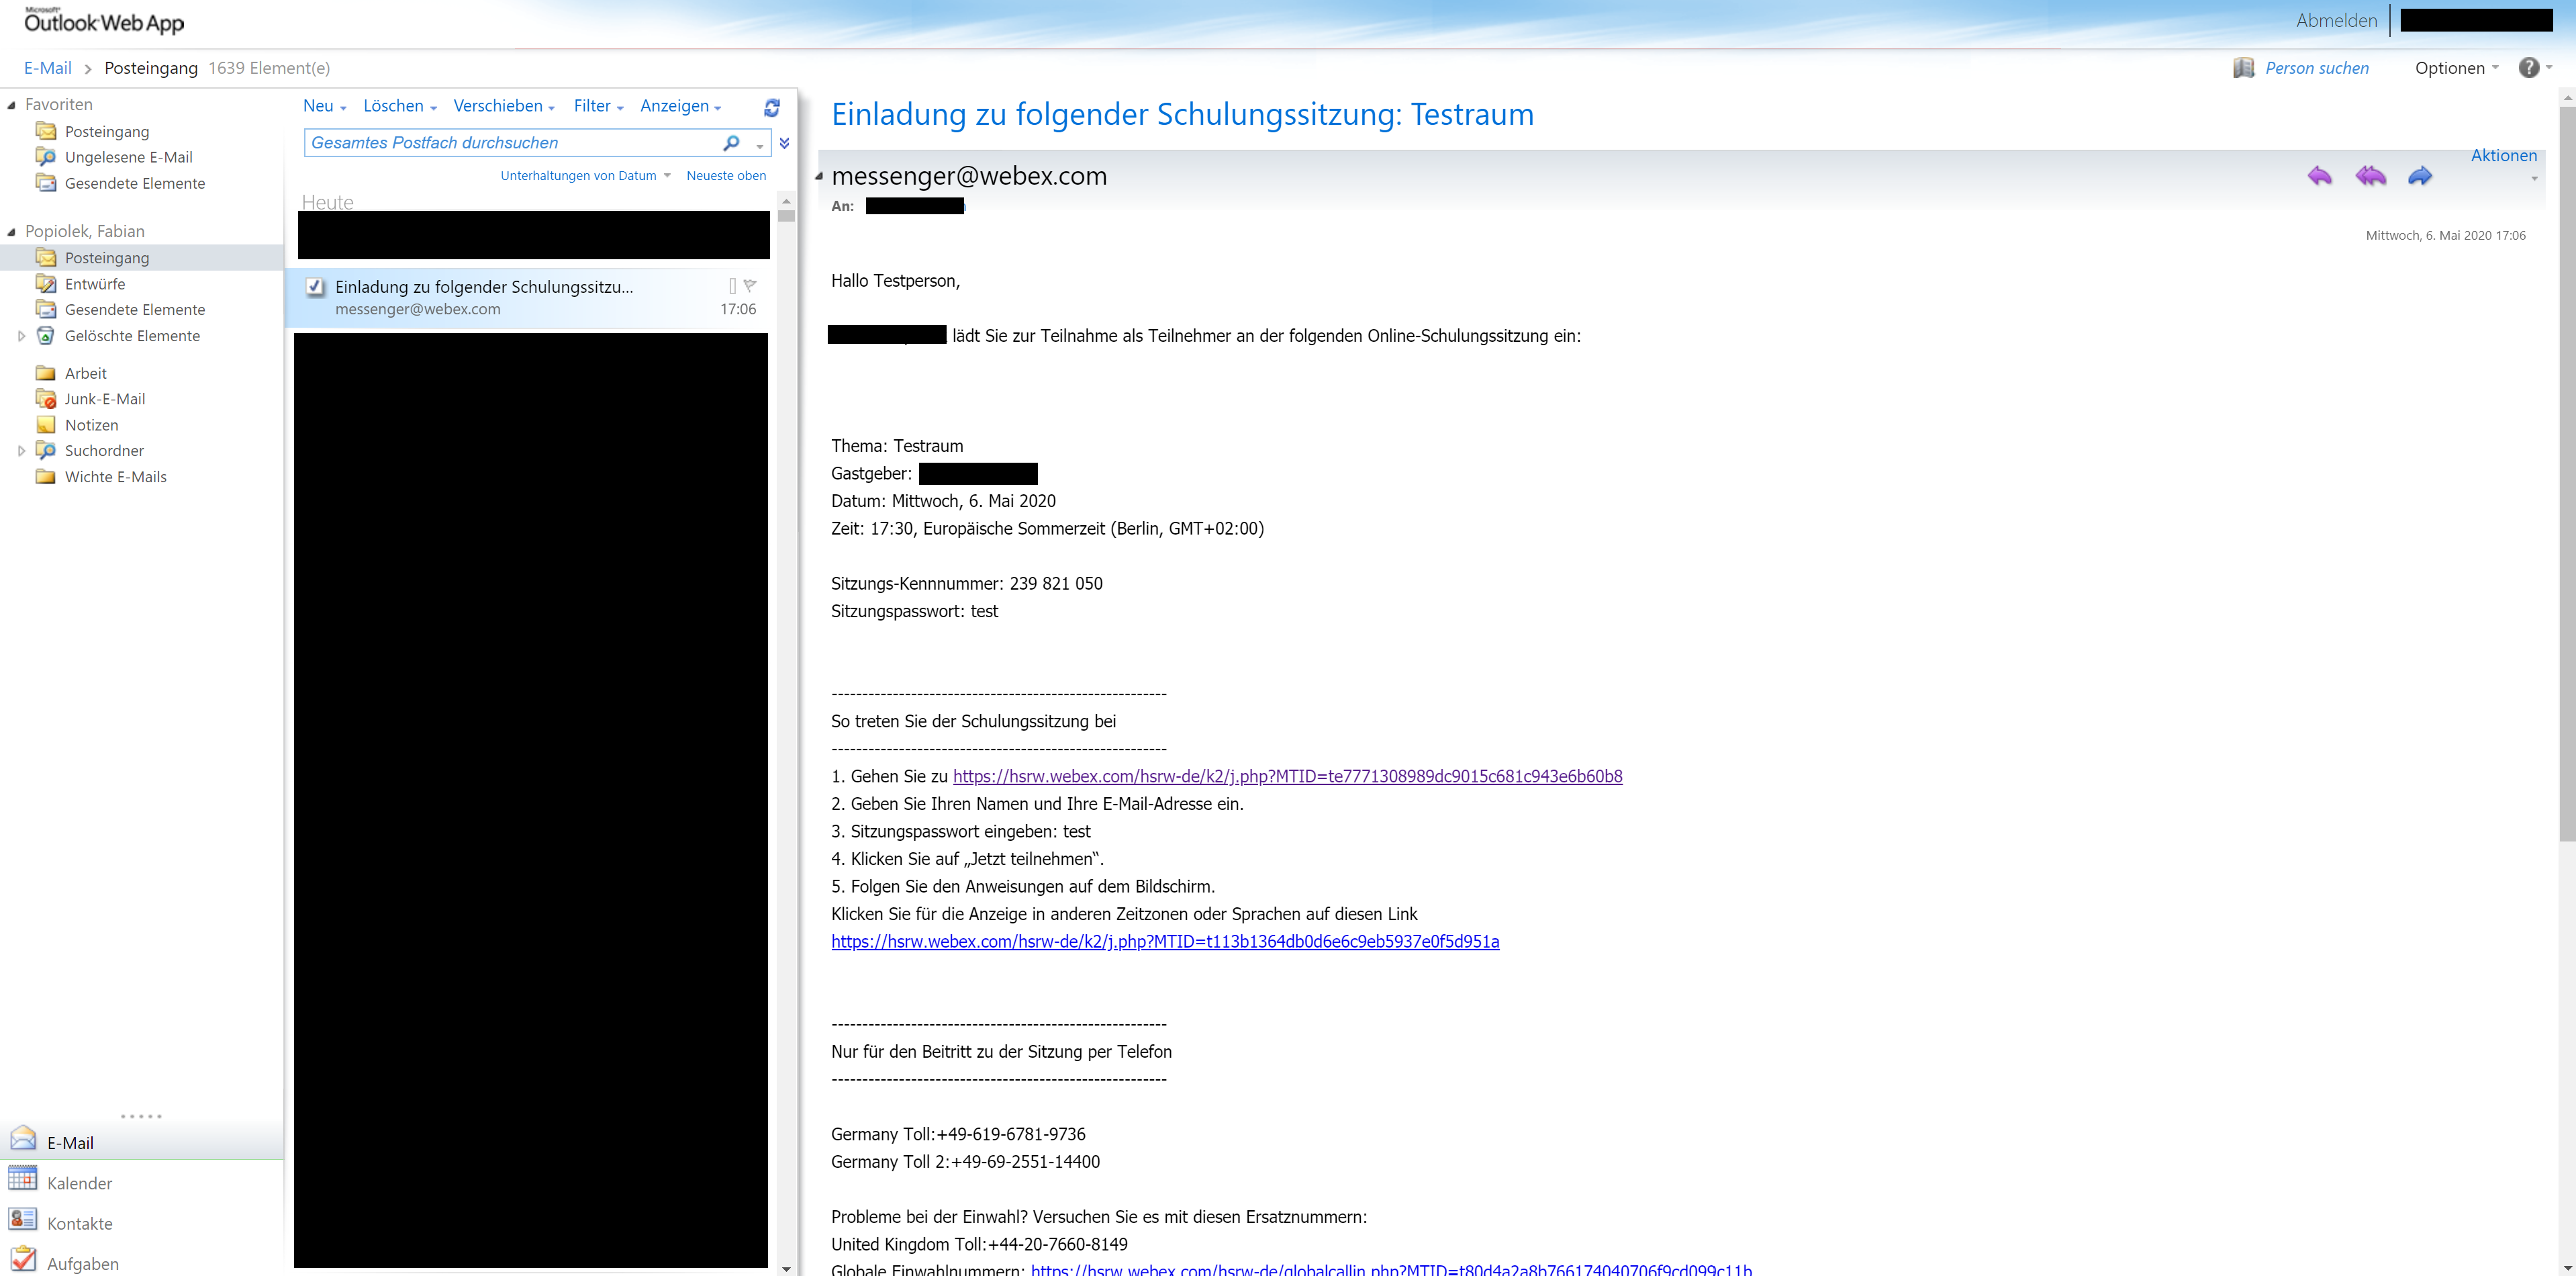
When you click the link, you are forwarded to a join-dialogue. You can now follow the steps as detailed in the E-mail, or follow the relevant steps in the above „Joining per link“ guide.
Please click the button „Join now“ and not „Join per browser“! You will be asked to install the Webex App. The app is much more reliable and offers more features than joining per browser!
You now successfully joined a session.
Back to: How do I use Webex Training <html>
</details>
<br>
<details> <summary><b>Joining a session via <u>Session ID</u></b></summary>
</html>
If you received neither a link nor an invitation, you can still join the session directly. To do so you need the session ID as well as the session password
To type in the session ID, follow this link: https://hsrw.webex.com/training
1) Type in the session ID
Confirm with „Join now“.

2) Type in the session password
Confirm with „Ok“.

You can now continue with the guide „Joining per Link“.
Please click the button „Join now“ and not „Join per browser“! You will be asked to install the Webex App. The app is much more reliable and offers more features than joining per browser!
You now successfully joined a session.
Back to: How do I use Webex Training <html>
</details> </body> </html>
Funktionen innerhalb von Webex Training
All participants, who join a session, are muted by default. You cannot change this, since it's a setting done by the host.
<html><br></html>
<html> <body> <details> <summary><b>1) Sending a message</b></summary>
</html>
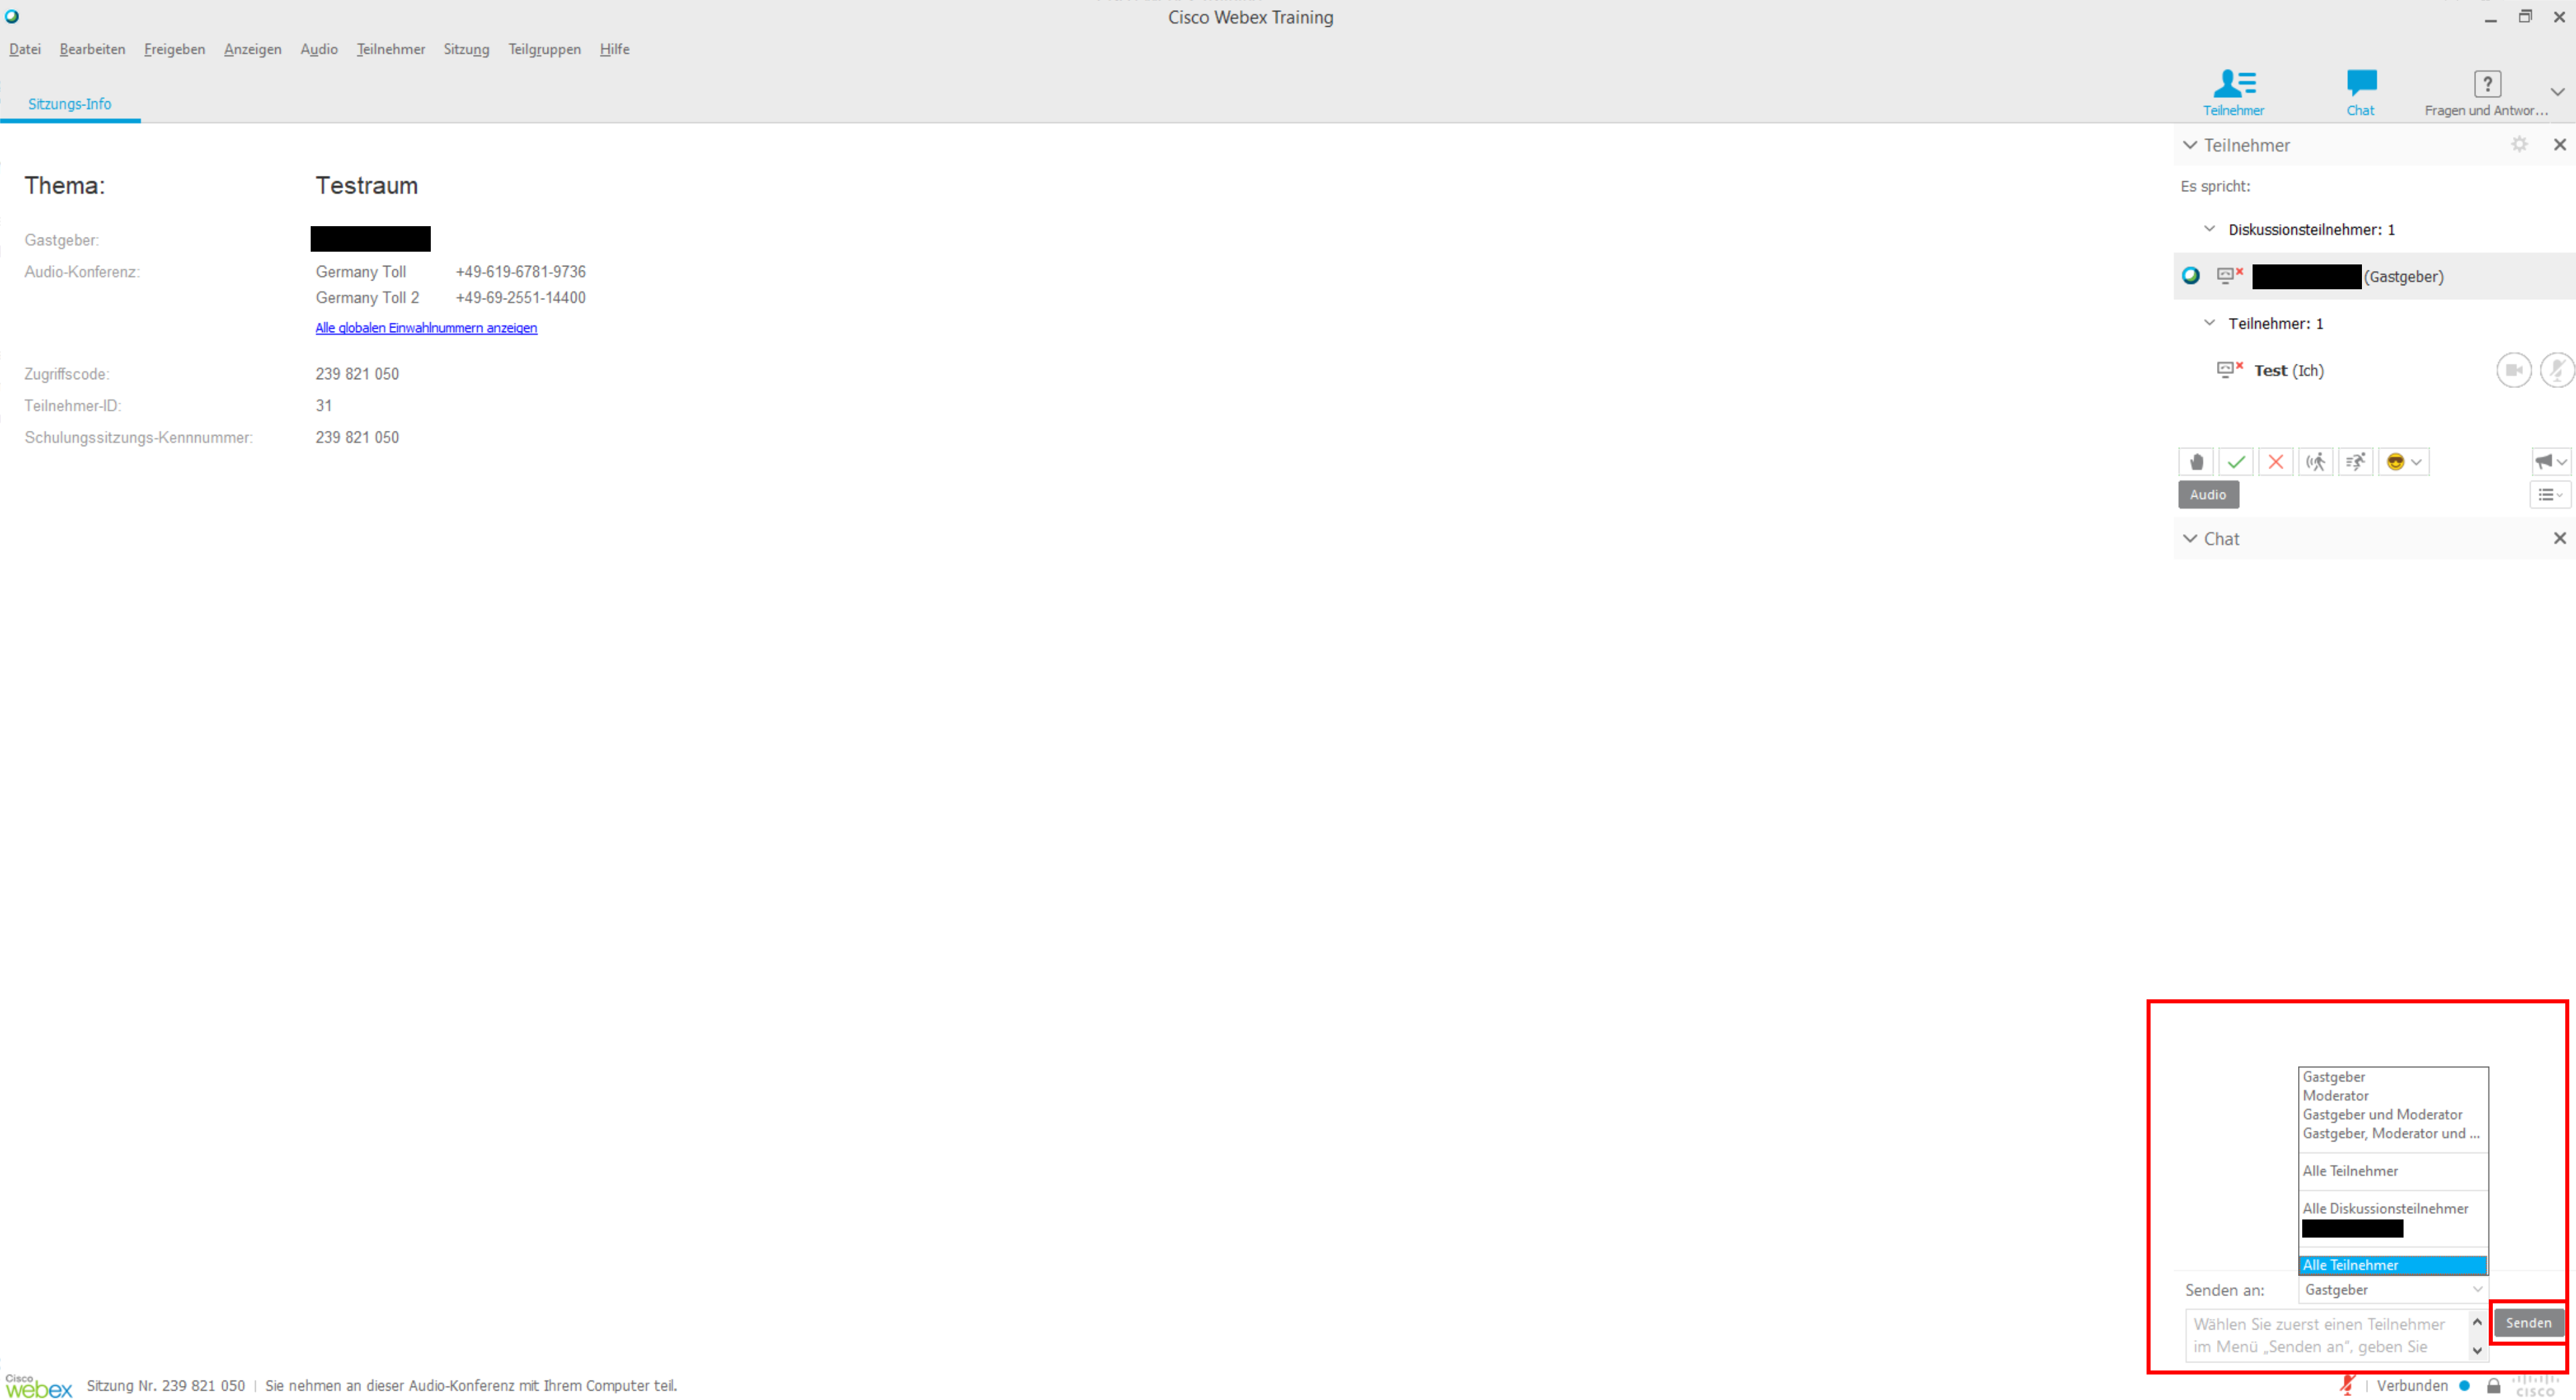
You can send a message to the host, moderators or all participants. To do so, type your message into the text field and click „Send“.
<html>
</details>
<br>
<html> <body> <details> <summary><b>2) Visualize to interact</b></summary>
</html>
You c an actively participate in the session even without speaking. Webex offers a variety of options to do so.
From left to right:
- Notification: If you want to convey something
- Yes: To confirm or agree
- No: To deny or disagree
- Slower: Ask the panelist to slow down.
- Faster: Ask the panelist to speed up
- Smileys: Additional visualisation
The Symbols should now appear to the right of your name. This way, the host or a moderator is able to consider your wishes.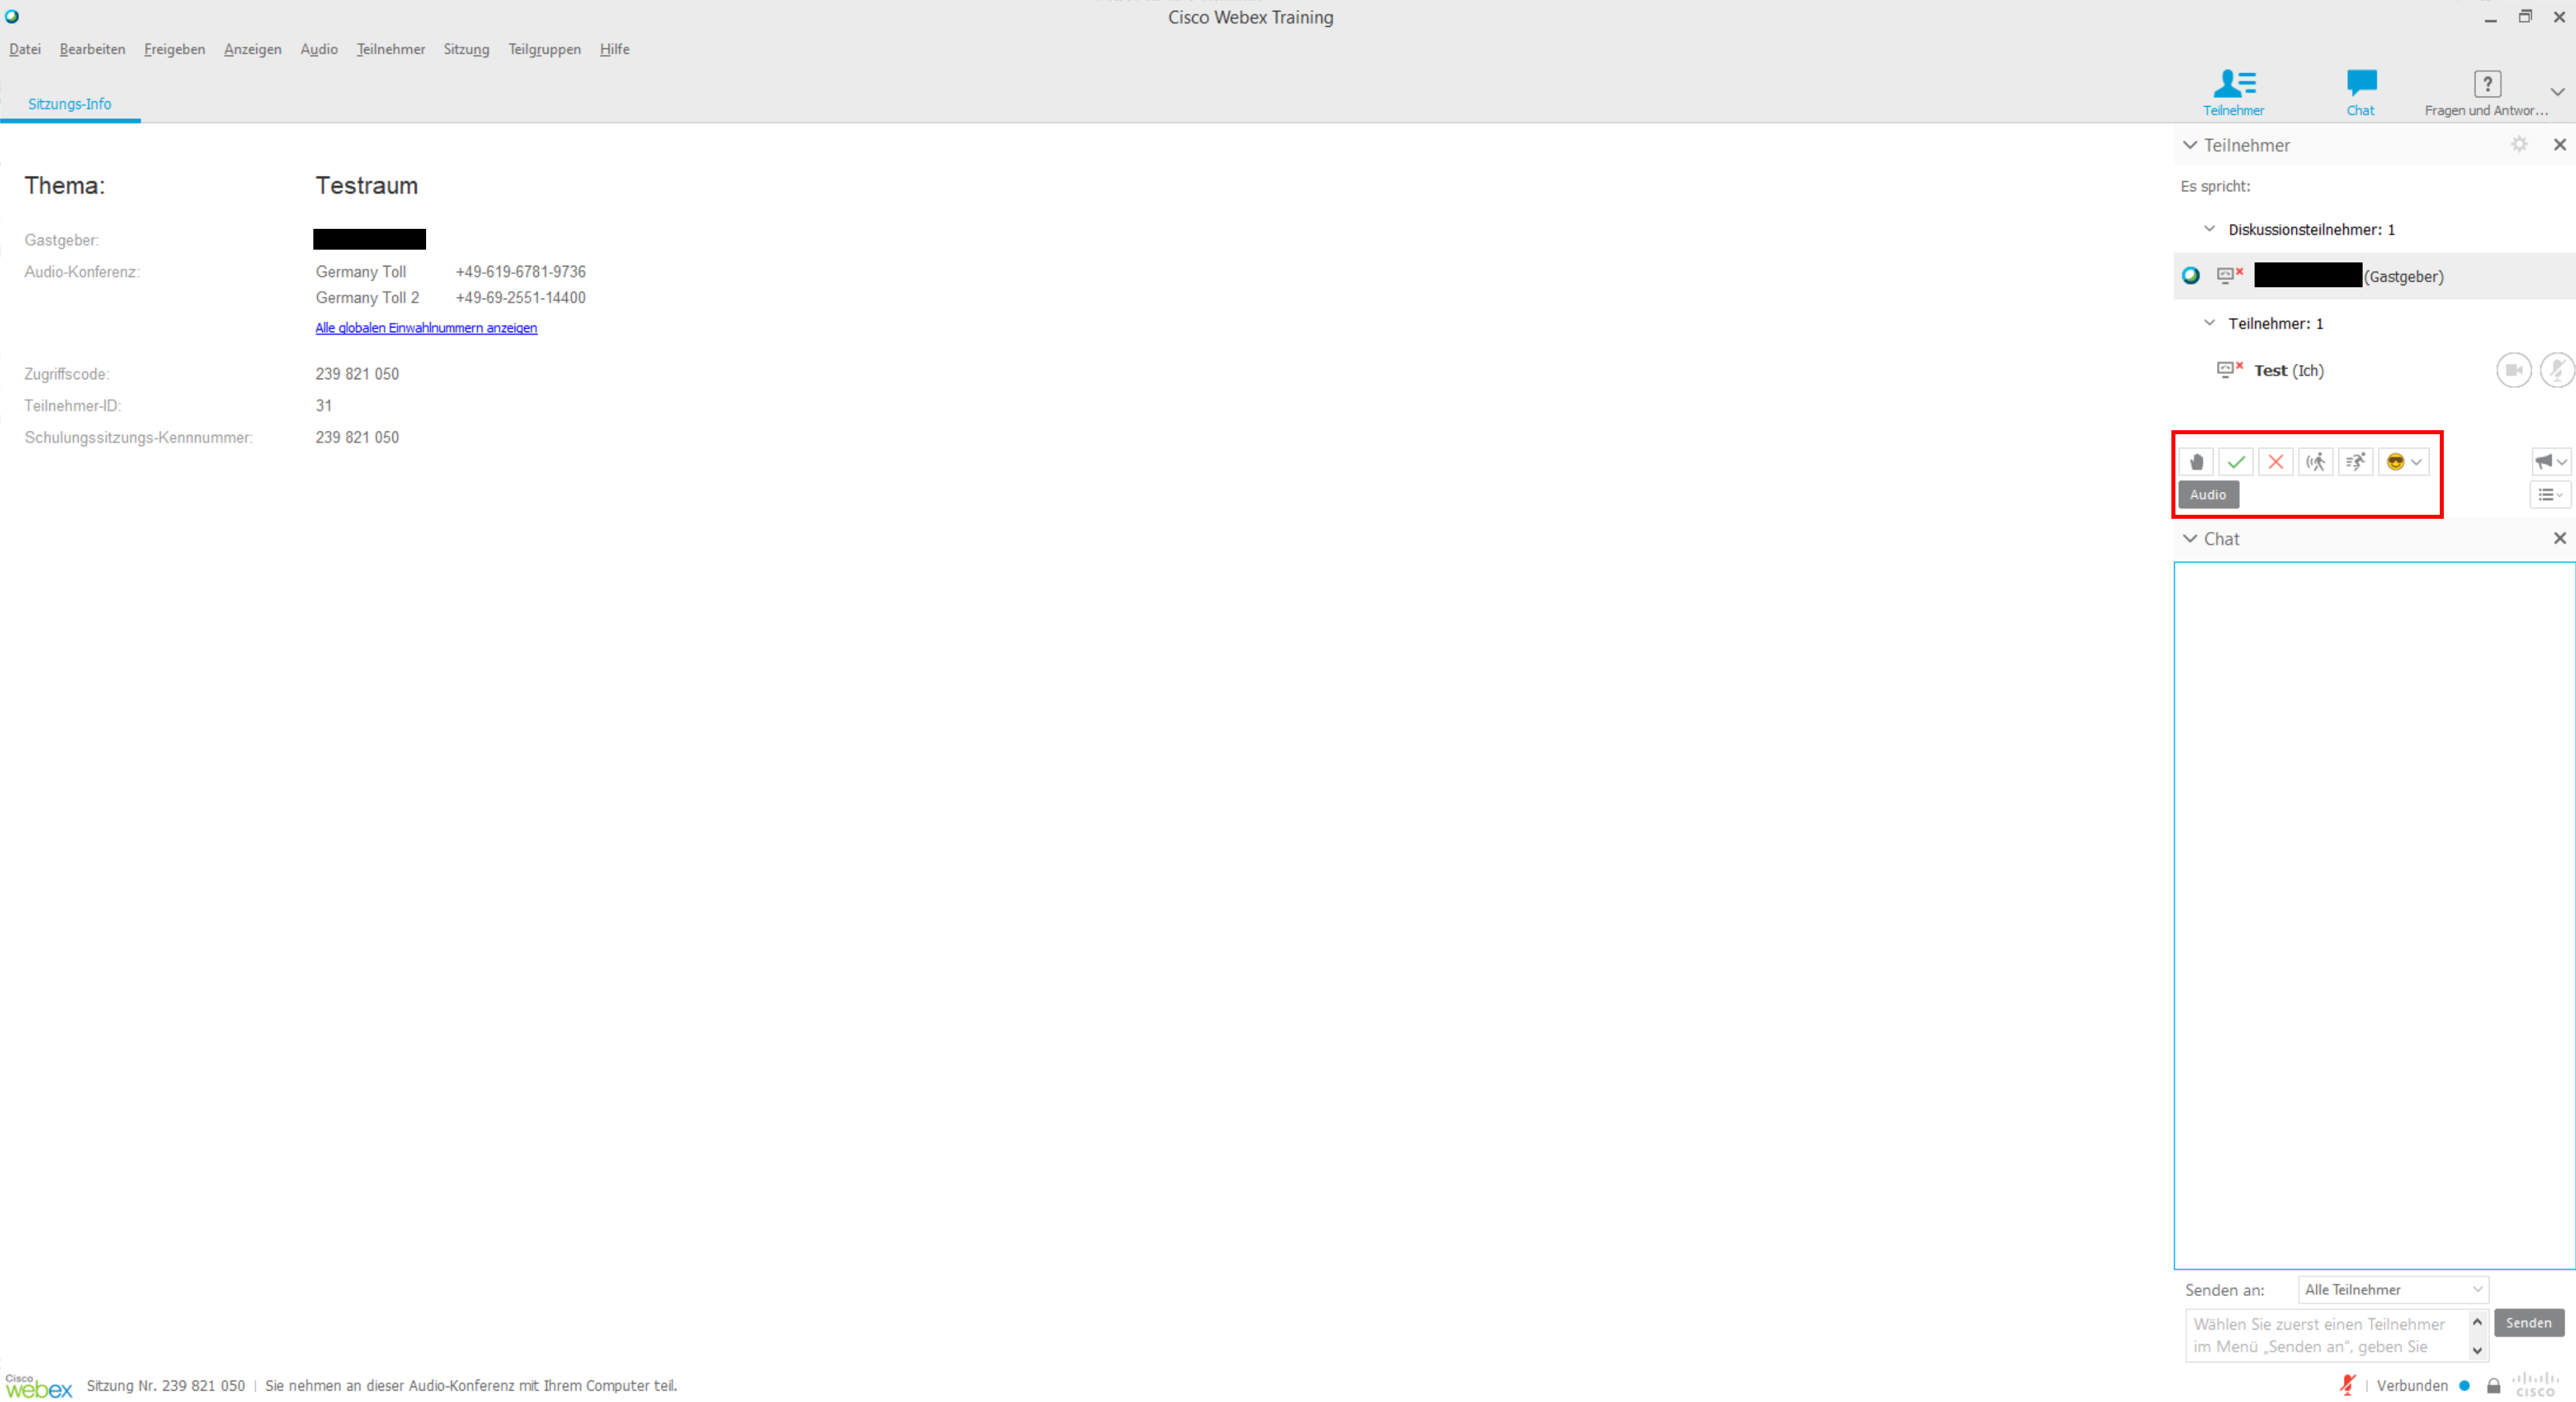
<html>
</details>
<br>
<html> <body> <details> <summary><b>3) Microphone and Webcam</b></summary>
</html>
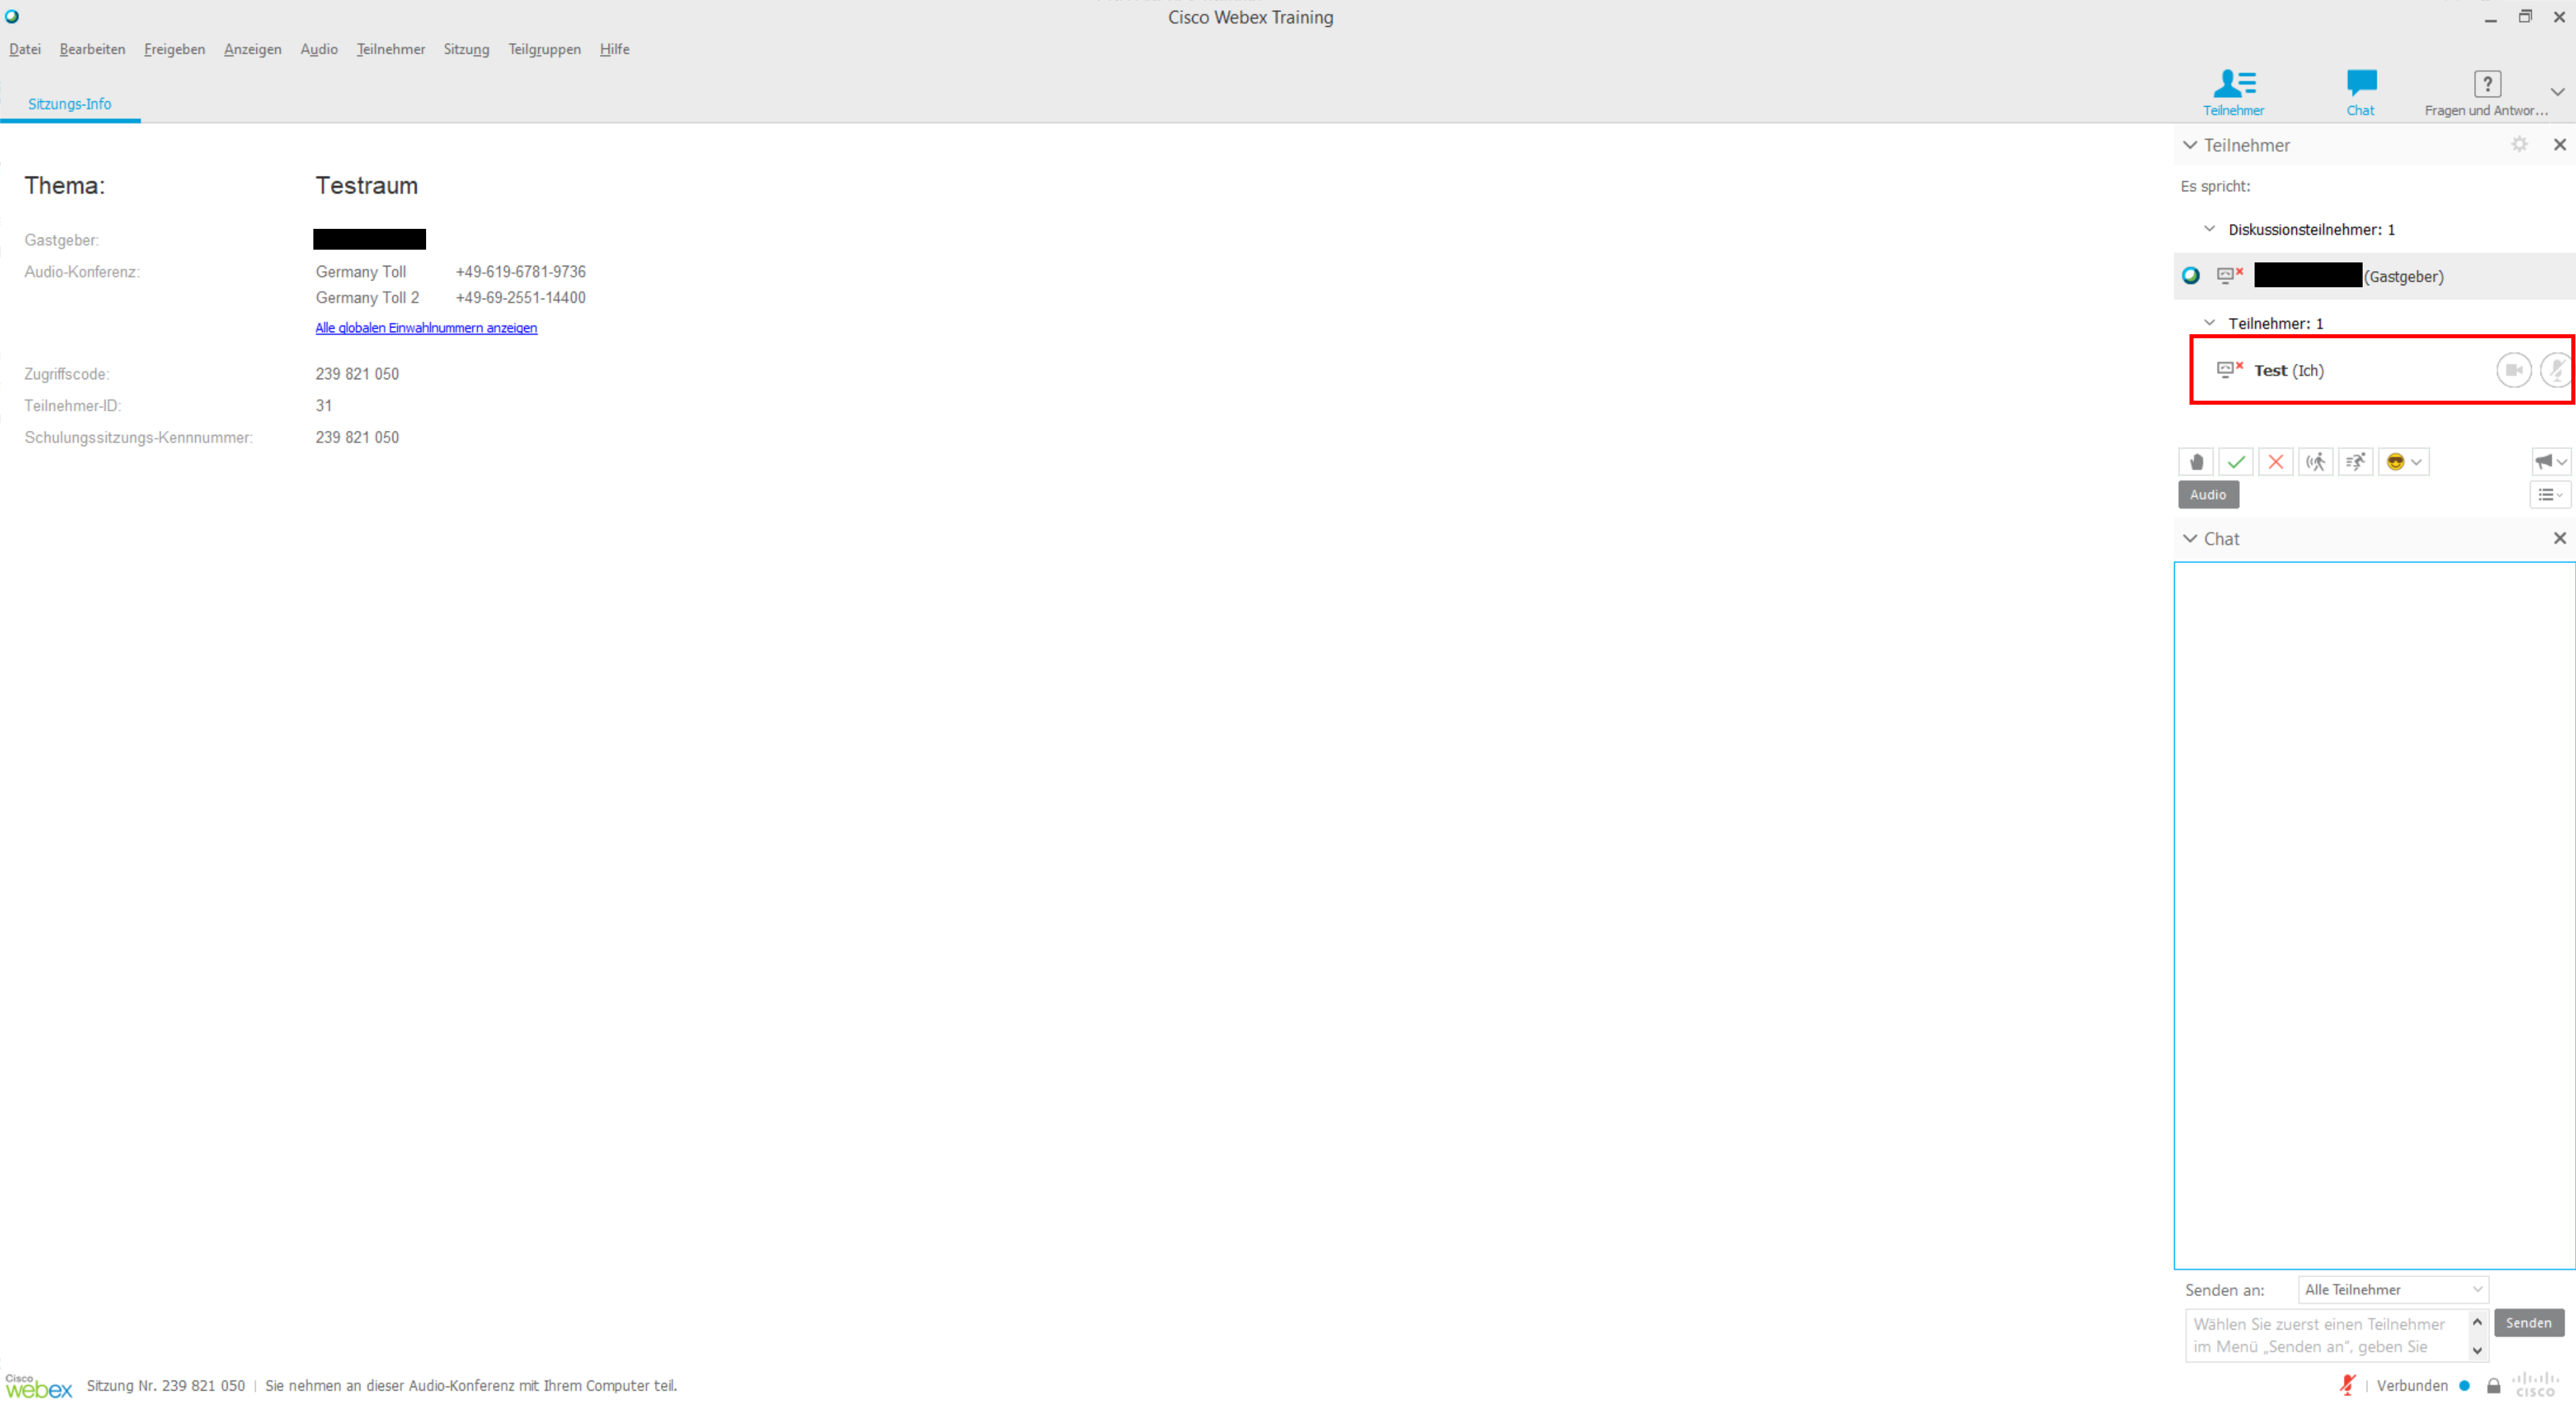
If the host has unlocked Voice- and Videochat for participants, you can use these buttons to activate or deactivate your webcam and/or microphone.
<html>
</details>
<br>
<html> <body> <details> <summary><b>4) Screensharing</b></summary>
</html>
As participant it's possible to share your screen with others, if the host gives you the „Moderatorball“.
In the following picture (Point 1) you can see that now you're not a participant but a panelist. Furthermore you will see the Webex logo next to you rname. That's the so called „Moderatorball“. You now have the ability to share your screen or certain applications with other participants. (Point 2).

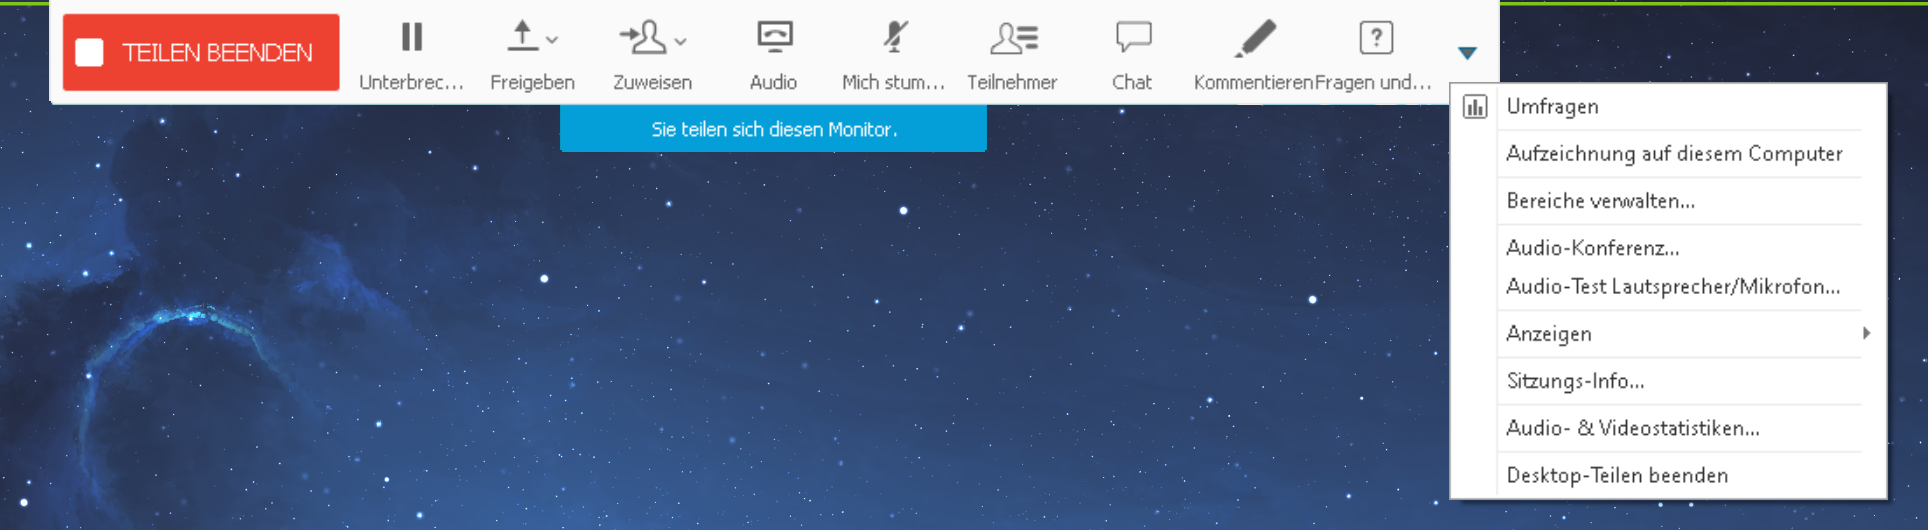
By default, there will be a menu bar at the top of the screen.
The most important functions:
- Stop sharing: Stops the screenshare
- Pause: Freezes the screen for all viewers, until this button is pressed again
- Audio: Activates or deactivates sharing sound (i.e. sounds from your browser or open videos. Does not affect your microphone)
- Mute myself: Deactivates your microphone
<html>
</details> </body> </html>